
Self-service setup guides

Shure BLX24/SM58 Setup Guide

Set up your wireless handheld microphone for speeches, presentations and live vocals.

Reviewed by the Rent Loud team Updated 16 October 2026

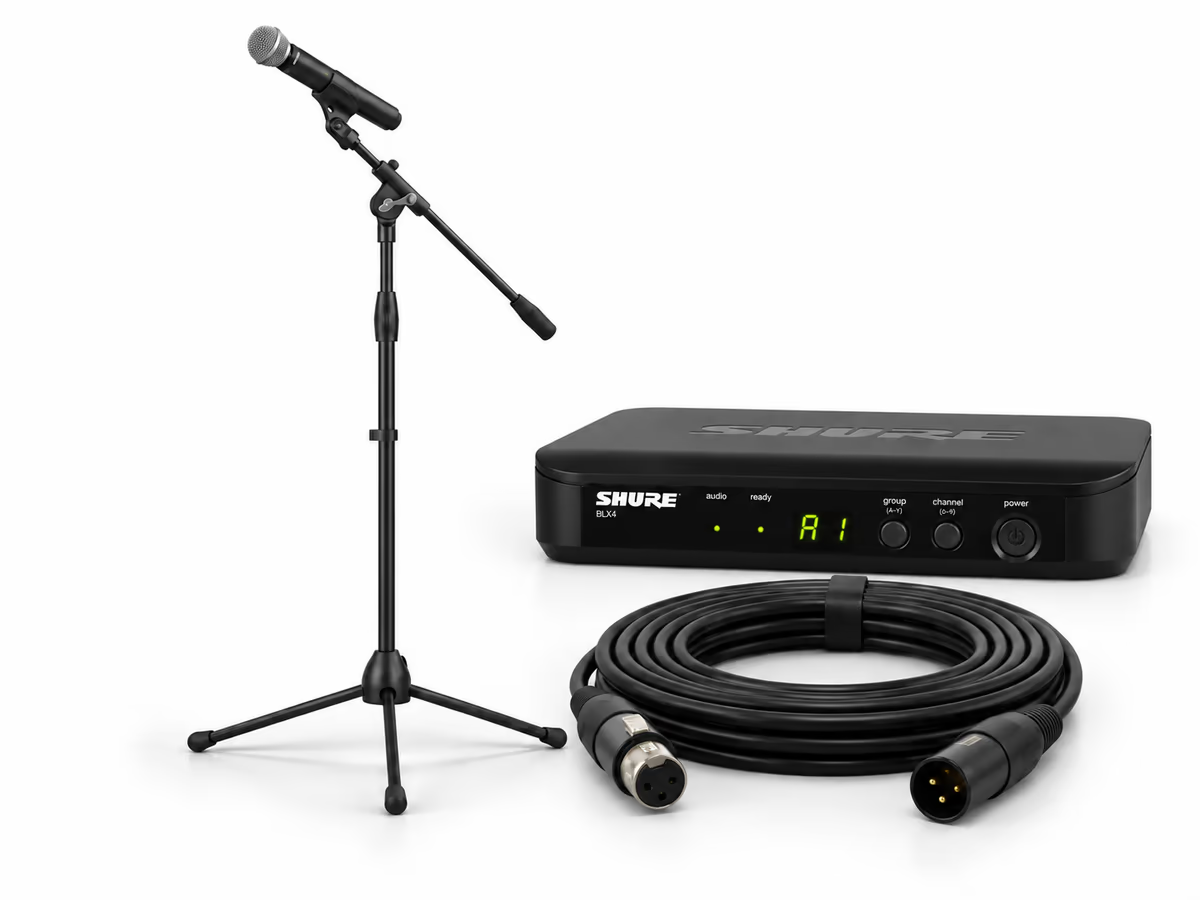
Wireless handheld microphone, receiver, microphone stand and XLR cable
Package checklist Step-by-step setup Safety and cable tips

At a glance

Shure BLX24/SM58 Package

£30/day

Package focus

SM58 vocal clarity with wireless handheld freedom, receiver and microphone stand.

Signal path

  1. BLX2/SM58 handheld microphone
  2. → Wireless → BLX4 receiver
  3. → XLR → your speaker or mixer microphone input

Need extra cables or adapters? Visit Cables & Accessories to add free cables and adapters with at least £49 of equipment hire before discounts.

Before you begin

Choose safe positions, then check every item is there.

What's included

  • 1x 10m XLR Cable
  • 1x G4M Boom Mic Stand
  • 1x Shure BLX24/SM58 Wireless Microphone

Good setup position

  • Check your booking includes the handheld microphone, BLX4 receiver, receiver power supply, microphone stand and 10m XLR cable.
  • Arrange a compatible powered speaker or mixer separately. The wireless microphone system does not produce amplified sound by itself.
  • Check the microphone has two AA batteries with enough charge for your event.

Setup steps

Work through the setup in this order.

Step 1

Position the receiver and stand

  1. Place the receiver on a dry, stable surface with a clear view of the microphone position, away from metal obstructions and other wireless equipment.
  2. Spread the microphone stand legs fully and keep the microphone behind and aimed away from loudspeakers.

Step 2

Connect the sound system

  1. Switch off your sound system and lower its input levels before connecting cables.
  2. Connect the receiver's XLR MIC OUT to a compatible microphone input on your powered speaker or mixer using the supplied 10m XLR cable.

Step 3

Power the receiver

  1. Connect the supplied receiver power supply to the receiver's DC input and a suitable mains socket. Do not use an IEC cable or an unknown power adapter.
  2. Turn on the receiver and leave the handheld transmitter switched off while scanning.

Step 4

Match the group and channel

  1. Press and release the receiver's group button to scan for an available group and channel.
  2. Fit two AA batteries in the handheld transmitter following the polarity markings, then switch it on.
  3. Use the transmitter's group and channel buttons to match the group letter and channel number shown on the receiver. Check the receiver's ready light illuminates.

Step 5

Test the microphone

  1. Turn on your mixer and powered speakers with levels low. Speak or sing close to the microphone and raise the microphone input level gradually.
  2. Check the receiver's audio light responds. Walk through the area you will use and check for dropouts before guests arrive.
  3. Keep your hand clear of the microphone grille. Lower the sound system input level immediately if you hear feedback or distortion.

Step 6

Pack down safely

  1. Lower microphone levels and switch off powered speakers before disconnecting the receiver.
  2. Switch off the handheld transmitter and receiver, disconnect power and coil the XLR cable loosely.
  3. Return the handheld microphone, receiver, power supply, stand and cable together.

Useful tips

Keep the setup clear, tidy, and under control.

Using several microphones
  • Add a suitable mixer to your basket when you need more microphone inputs. Speakers and mixers are separate products.
  • Tell us how many wireless systems you plan to use so we can check compatibility. Keep an already configured transmitter and receiver on while scanning the next compatible system; use the same group and a different available channel for each system.

Troubleshooting

Quick checks if something is not working.

No wireless signal
  • Check transmitter batteries and power, and match the group and channel on the transmitter and receiver.
  • Move the receiver into clear view of the microphone and check its ready light.
Signal but no sound
  • Check the receiver's XLR MIC OUT connection, your sound system's microphone input and its level controls.
  • Speak close to the microphone and check the receiver's audio light before raising levels gradually.
Dropouts or interference
  • Check battery charge and remove obstructions between the handheld microphone and receiver.
  • Lower sound system levels, switch off the affected transmitter and scan for an available channel before matching it again. Test the whole system before continuing.

Important safety notes

Keep your microphone setup dry and clear of guests.

  • Keep equipment away from drinks.
  • Protect cables crossing walkways and keep the stand stable.
  • Use the supplied receiver power supply and keep battery polarity correct.

Need help?

If you get stuck, contact Rent Loud.

Explore next

Keep exploring