
Self-service setup guides

Pioneer DJ XDJ-RX3 Package Setup Guide

Standalone two-deck DJ performance with a large touchscreen and creative effects.

Reviewed by the Rent Loud team Updated 16 October 2026
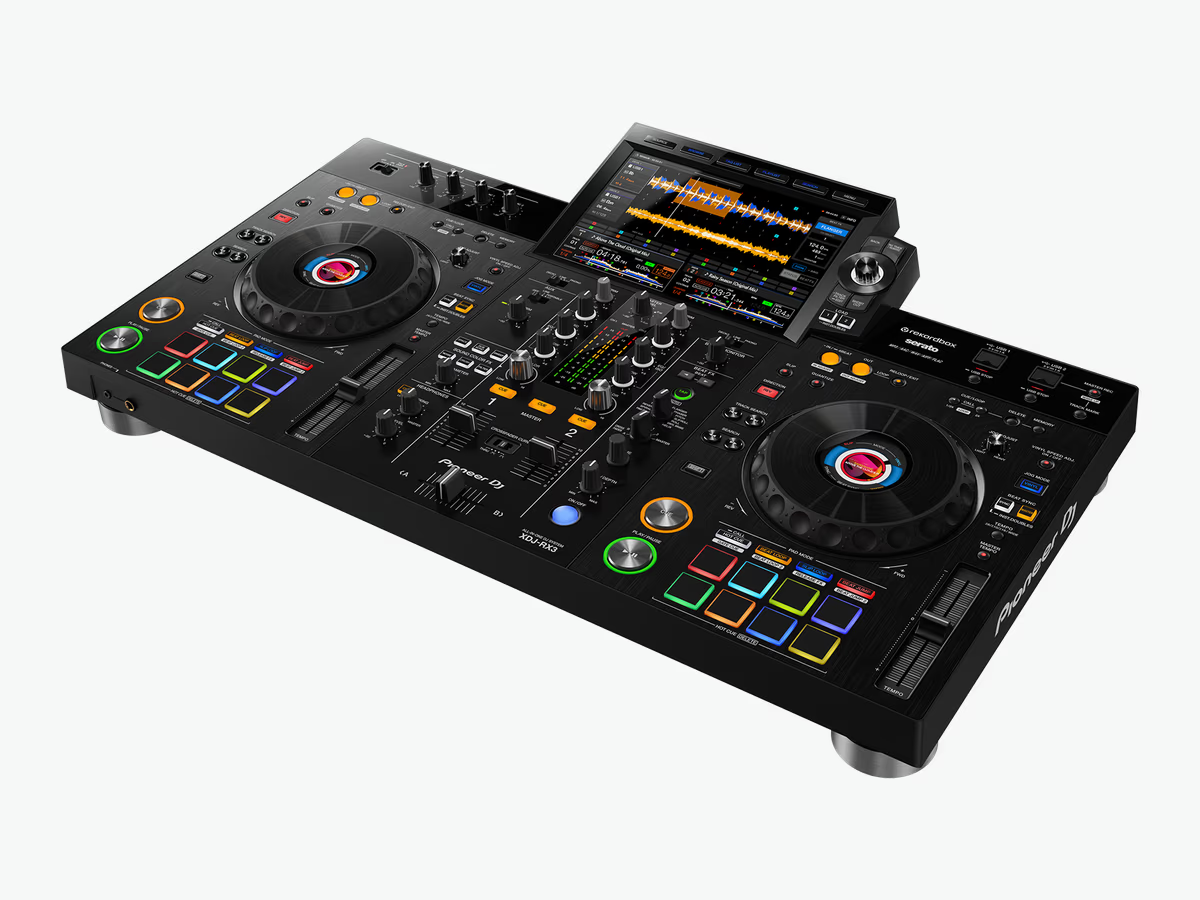
Pioneer DJ XDJ-RX3 Package
Package checklist Step-by-step setup Safety and cable tips

At a glance

Pioneer DJ XDJ-RX3

£99/day

Package focus

Standalone two-deck DJ performance with a large touchscreen and creative effects.

Signal path

  1. Your prepared rekordbox USB music
  2. → Pioneer DJ XDJ-RX3 Package
  3. → Your compatible powered speakers or PA

Need extra cables or adapters? Visit Cables & Accessories to add free cables and adapters with at least £49 of equipment hire before discounts.

Before you begin

Choose safe positions, then check every item is there.

What's included

  • 1x 10m IEC Cable
  • 1x Pioneer XDJ-RX3

Good setup position

  • Check the equipment and power accessories listed on your booking.
  • Arrange compatible powered speakers or a PA separately; this hire contains the mixer or decks and the listed power accessories.
  • Add extra cables and adapters from Cables & Accessories to your basket, free with at least £49 of paid equipment hire before discounts, excluding delivery and setup.

Setup steps

Work through the setup in this order.

Step 1

Choose a stable position

  1. Place the equipment on a stable, dry table with room for ventilation and access to the controls.
  2. Keep drinks away from the equipment and protect cables crossing walkways.

Step 2

Connect power with levels low

  1. Keep the sound system switched off while making connections. Lower input, channel and master levels before powering up.
  2. Connect the supplied IEC mains power cable securely to the unit and a suitable power socket.

Step 3

Connect your audio sources

  1. Bring a compatible USB drive containing your music, prepared and exported from rekordbox. Insert it into a top USB port and select the USB source.
  2. Load a test track onto a deck. Connect your own DJ headphones and use the headphone cue controls to check it before raising the main sound.
  3. Standalone USB playback does not need a laptop. If you plan to use DJ software, check compatibility and prepare your own laptop and USB connection before the event.

Step 4

Connect the sound system

  1. Connect MASTER 1 left and right XLR outputs to compatible powered speaker or PA line inputs. Headphones, microphones, speakers and a DJ are separate from this equipment hire.
  2. Start with the powered speaker inputs set for a line-level source and their levels low. Switch on the mixer or decks before the speakers.

Step 5

Test and balance the sound

  1. Play or perform a test at a low level. Raise the relevant channel and master levels gradually, keeping level meters out of clipping.
  2. Walk around the listening area and balance the speakers for comfortable coverage. Lower levels immediately if you hear distortion or microphone feedback.

Step 6

Pack down safely

  1. Stop playback and lower levels. Switch off powered speakers first, then the mixer or decks.
  2. Disconnect power and signal cables, remove your USB drives and personal accessories, and coil cables loosely.
  3. Check your booking's equipment list and return all supplied power accessories, cables and adapters.

Useful tips

Keep the setup clear, tidy, and under control.

Free cables and adapters
  • Choose the cables and adapters you need from Cables & Accessories and add them to your basket. They are free with at least £49 of paid equipment hire before discounts, excluding delivery and setup.

Troubleshooting

Quick checks if something is not working.

No sound
  • Check the source is playing, the correct input or deck is selected, and channel and master levels are raised gradually.
  • Check the main output cables and powered speaker line inputs. Check headphone monitoring separately from the main output.
Distortion or feedback
  • Lower the input gain or deck trim if its meter clips, then rebalance channel and master levels.
  • Keep microphones behind and aimed away from speakers. Lower the microphone level immediately if you hear ringing.

Important safety notes

Keep your mixer or decks dry, stable and clear of guests.

  • Keep equipment dry and away from drinks.
  • Keep ventilation clear and protect cables from trips and pulling.
  • Do not open equipment or disconnect signal cables at high volume.

Need help?

If you get stuck, contact Rent Loud.

Explore next

Keep exploring